Introduction to Tokens/es: Difference between revisions
mNo edit summary |
m (Taustin moved page introduction to Tokens/es to Introduction to Tokens/es over redirect) |
||
| (3 intermediate revisions by 3 users not shown) | |||
| Line 255: | Line 255: | ||
[[Category:Tutorial]] | [[Category:Tutorial]] | ||
{{Languages|Introduction to Tokens}}{{#customtitle:Introducción a tokens | {{Languages|Introduction to Tokens}}{{#customtitle:Introducción a tokens|Introducción a tokens}} | ||
Latest revision as of 23:59, 15 March 2023
BEGINNER
THIS IS A BEGINNER ARTICLE
La traducción está en proceso
Introduction to MapTool Tokens
As mentioned in the Introduction to Mapping guide, a token is the MapTool jargon for a visual marker that is placed on a map within the MapTool software. The most intuitive use for tokens is to represent characters in the game - in other words, tokens take the place of miniatures on the virtual tabletop.
Assumptions
This guide assumes that you have read the Introduction to Mapping, and that you know how to:
- Add folders to your Resource Library, and update/add images to those folders so that they appear in your resource library
- Create a map in MapTool
- Place tokens on a map, and move them around
- Change token names, GM names, labels
- Change the token's size
- Change the token's image
- Move tokens from one layer to another
If you don't know how to do these things, please read the Introduction to Mapping guide - otherwise, the stuff below might not make much sense!
Finally, this guide will be written predominantly from the point of view of the GM -- someone who has complete control over all token settings and campaign properties. Players (that is, individuals who join a game in the role of "Player") are restricted from changing many things in a particular campaign.
MapTool's Layers
Although most MapTool users use the term "token" to refer only to images representing characters and creatures on a map, in reality, the word "token" refers to any image item that is dropped onto a map in MapTool. The way a particular token is handled is dependent on the Map Layer onto which it is placed. These layers are explained below, because they are important in understanding how to work with tokens.
- Items dropped on the Token layer are what we most commonly consider "tokens" - these represent characters, monsters, NPCs - the people and creatures of the game.
- Items dropped on the Object layer are most commonly images representing furniture, chests, and things in the game world - something that a person can manipulate or use. MapTool still considers them to be tokens, of course (everything is a token to MapTool - it's very singleminded) but for clarity's sake, most users call them Objects to distinguish them from tokens that represent characters
- Items dropped on the Background layer are typically things that make up the map - walls, cliffs, dirt, grass. They might be unique, but are most often "stamped" onto the map over and over again, either in a pattern or because you're using several copies of the same image (for instance, using several copies of a wall image to make a complete room). Because of this, many users will call these images stamps.
The Hidden Layer
You'll note that I didn't discuss the Hidden layer in the above paragraph. That's because the Hidden Layer has a slightly different purpose.
While the Token, Object, and Background layers have a fairly intuitive relationship in terms of how one might think of the world -- I'm a person or creature, that item over there is an object, and surrounding us is the background -- the Hidden Layer is the things you cannot see. In MapTool, anything placed on the Hidden Layer is visible only to the GM until he or she decides to move it to one of the other layers.
Generally, you'll want to put characters and objects on this layer - there aren't many reasons to put a background stamp on the hidden layer, although I'm sure you can think of a couple.
Suffice it to say, when you place a token on a MapTool map, it pays to be aware of which layer you placed it on!
Creating a New Token
Creating a token is as simple as dragging an image from the Resource Library onto the Token Layer of a map. But how do you create an image in the first place? There are several options.
Download an Image
MapTool's user community has created a wealth of token images that are available for use. Visit the RPTools Gallery to see the hundreds of token images already out there.
Create one Using TokenTool
Another option is to create your own images using TokenTool, a program built by the makers of MapTool to create token images quickly and easily. To create an image using TokenTool:
1. Download TokenTool and open it by double-clicking on the file with the extension .jar (this is a Java "JAR file" which will run a java program).
2. Find an image you like (be cautious about copyright!) and drag it onto the left pane of the TokenTool window (this is the part with the small green ring and a black background).
3. When the image appears, drag it around with the mouse until the portion you want for your token is inside the green ring. You'll see a preview of what the token will look like in the upper right side of the TokenTool window.
- Tip: You can use the mouse wheel or the zoom buttons to adjust the image's size until it looks just right.
- Tip: You can change the look and color of the border, the final size of the token, and many other settings by using the drop-down menus on the right-hand side of the TokenTool window.
4. When you get it where you like it, go to File > Save Token, and save the newly created token in a directory that is either already in your Resource Library, or is one you plan to add to your resource library. Note that the file will be saved in PNG format (this is a good thing! it allows for transparency so your token isn't slopping outside the border!).
5. Go back to MapTool and add or refresh your Resource Library, and there you'll see your new token! Drag it onto a map, and you're good to go.
Draw One Yourself
You can create a token image of your own by using an art program and saving the file in PNG or JPG format, in a directory that is either in your Resource Library, or a directory you plan to add to your Resource Library. PNG format is the recommended format for MapTool tokens because it allows for transparency and, basically, looks the best.
You can of course combine drawing your own image with using TokenTool to create handsome and neatly formed tokens.
Editing a Token
Editing a token means changing any of the token's characteristics, be that its image, its name(s), or its configured settings. Changing token names, image, and size are covered in Introduction to Mapping.
The following sections deal with the various options, tabs, and drop-down boxes in the Edit Token Dialog.
Token Type
Tokens have 2 possible types in MapTool: NPC and PC. These will be familiar to players of roleplaying games because they stand for "Player Character" and "Non-Player Character," and the most common use of this "type" setting is to distinguish between the two groups during actual play.
In general, tokens belonging to your players should have the type "PC." Tokens belonging to you should have the type "NPC".
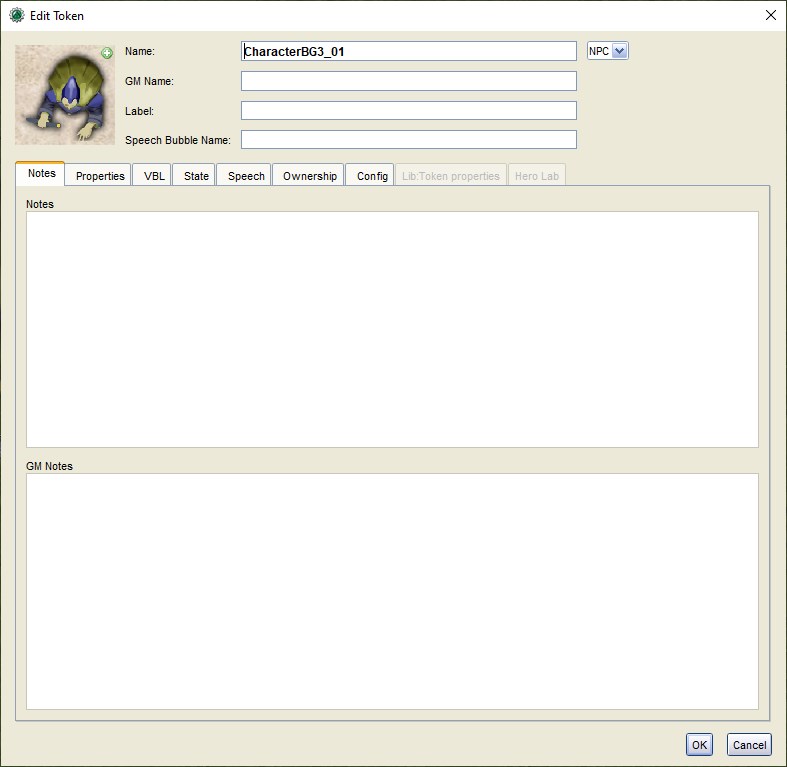
NOTE: The type of a token does not have any bearing on who may manipulate that token or view it's properties - instead, that power is granted to the owner or owners of a token. As GM, you are considered to have ownership of all tokens on all maps in the campaign. See Ownership, below, for more details.
To change the token type:
1. Double-click the token to open the Edit Token dialog.
2. In the upper-right corner, use the drop-down box to select PC or NPC.
3. Click OK.
Notes
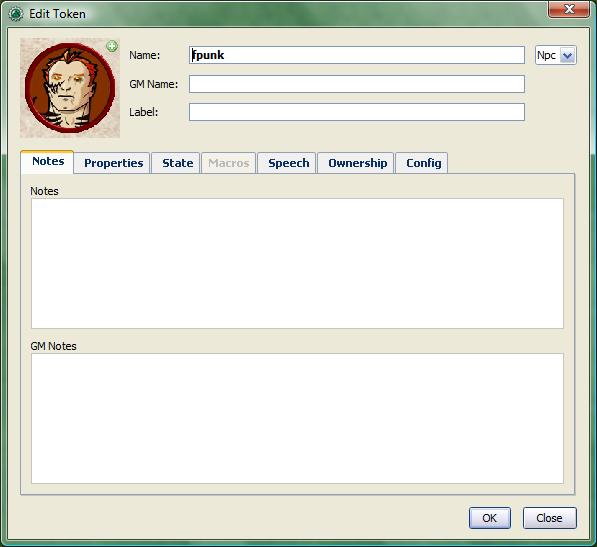
The Notes tab presents two areas where you can enter notes about the token. These fields support basic HTML tags, so you can format the note.
The upper text field is there for notes that are available and visible to anyone who wishes to see. The lower field (titled GM Notes) is for notes that only the GM(s) should see.
Notes are a little tricky - MapTool has a way to display them in a nifty popup, but you have to do a couple things first.
- Enter information in the notes field of a token.
- Place that token on the Object Layer or the Background Layer by right-clicking and selecting Change To >
- Switch back to the Token Layer
Now, you'll notice that when you put your mouse cursor over the token, the cursor will change to a hand. If you double-click, instead of the normal Edit Token dialog, you'll see a small popup in the lower-left corner of the map, which will display the notes.
The major lesson is that -- while Token notes can be accessed in many ways -- one of the more common uses is to place notes and reminders on tokens and objects that will be on either the Object or Background layer.
Properties

Properties are a topic that deserve their own guide, as they are heavily involved in the creation and use of token macros. This guide won't go into excruciating detail about properties, but will instead deal with only the most basic information about them.
Every token dropped onto a map in MapTool automatically gains a set of properties, which can basically be thought of as stats, characteristics, or traits (you know, the numbers on a character sheet). In effect, each token is carrying around it's own built-in character sheet. In programming terms, properties can thought of as variables that can be set to different values, and then used later by macros.
- Note: although people frequently refer to "token properties," the properties that are visible in the Edit Token dialog are only those properties that are set up for the specific campaign.
When you click on the Macros tab in the Edit Token dialog, you'll see a list of the properties that are currently set up for the Campaign you're using. If you've opened up a new campaign (or just started MapTool), you will see the default property set, which looks like:
- Strength
- Dexterity
- Constitution
- Intelligence
- Wisdom
- Charisma
- HP
- AC
- Defense
- Movement
- Elevation
- Description
For the rest of this guide, examples using properties will use the list above.
The property list you see is in a table (or spreadsheet) layout, with the property name on the left, and a blank space on the right. In the space on the right, you can enter the value you want to assign to that property. You can enter text, numbers, or in more advanced cases, macro statements as the value for a particular property.
Once you do that, and hit OK, that property on that token will be assigned the value you enter. Later on, if you write macros, you can refer to those properties to make calculations or roll dice.
Since properties are such a major topic on their own, check out the Introduction to Properties guide for detailed information.
State

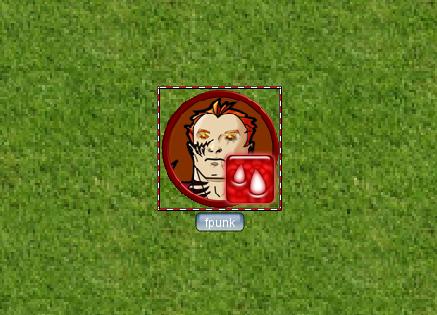
States are visual markers that can be applied to a token (typically appearing as an image superimposed on the token) that can be used for any sort of reminder that you might need in a game. For instance, if you want a marker that a particular NPC token is "dead", you can set the state "Dead" on the token, and whatever image you've selected to indicate "Dead" will appear on the token.
The default states that load when MapTool starts are:
- Dead
- Disabled
- Hidden
- Prone
- Incapacitated
- Other
- Other 2
- Other 3
- Other 4
Health Bar
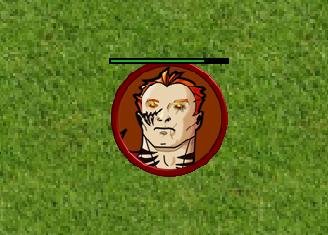
The State tab also contains the setting information for the bars that the token displays or can display. These bars are shown superimposed over the token (at the top, bottom, or sides), and can be used to track things like health (or ammunition, magic, or anything that can be lost or expended).
Macros
As of MapTool version 1.3.b54, the Macros tab is no longer enabled. This tab originally held the token macros, but as macro capabilities became more advanced, this tab became less and less useful, until finally, it was removed. It is present in earlier versions, though, if you want to take a look.
Speech
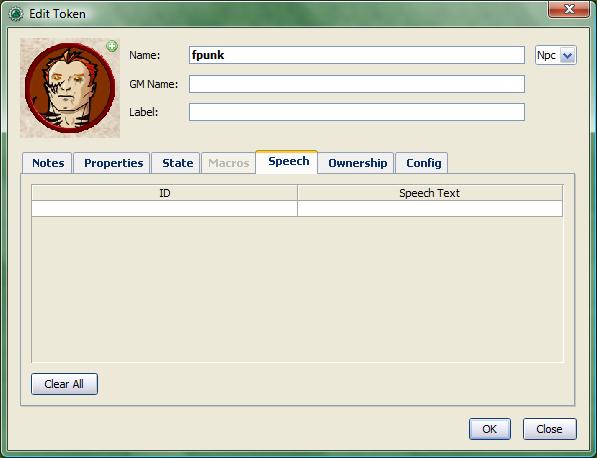
This tab contains the token's speech list. You can use this tab to configure sayings, aphorisms, battlecries, and anything you might want your token to "say" in chat. There are two fields for each speech item:
- ID: This field is the short identifier you assign to a speech item; the ID is used in chat to refer to the full text of the speech. It can be alphanumeric, so you could use number, or letters, or a mix. It cannot have any spaces in it, though!
- Speech Text: This is the actual text that will be displayed in the chat window.
To use a speech item, do the following:
- Select the token you want to have "say" something
- In the chat window, enter /tsay (ID), where "(ID)" is replaced by the actual ID of the speech item. So if you wanted to howl your battlecry - which you've cleverly given the ID "bcry" - you would select your token, and enter /tsay cry in the chat window.
Ownership
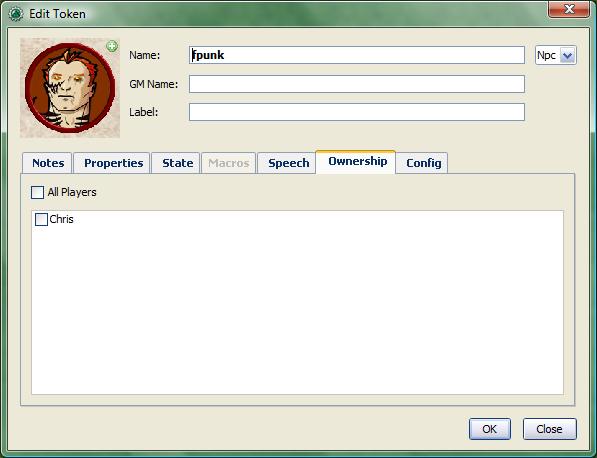
Token ownership determines who among the players connected to the game is allowed to select, move, or view the details of a given token.
If you are the owner of a token, you may select it, double-click on it to open and edit it, and move it around on the map. If you are not an owner of a particular token, you are limited to looking at it on the map -- you will not be able to select, move, or view its properties and configuration.
To set an owner, simply check the box next to that individual's name. The names shown in the box will be the names of each player (including the GM) connected to the game (so if you're looking at the Ownership tab when nobody else is connected, you'll see only your own name). If you want to give ownership to all players, just check All Players.
(Note that the selection of options when the server is started must include Strict token ownership if you want the functionality described above. See Introduction to Game Hosting#Starting Up a MapTool Server for details on server options.)
Config
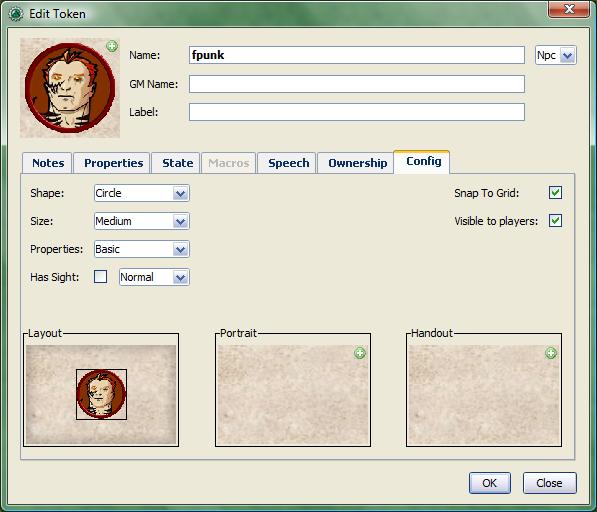
This tab contains a number of settings that affect how the token looks, moves, and interacts with MapTool.
Shape
Tokens can have three shapes in MapTool:
- Top Down: top-down tokens are usually hand-drawn or rendered images of creatures, objects, and people as if you were looking down from an aerial view. Setting the token shape to Top-down tells MapTool to allow the token image to rotate when you right-click on the token and select Change Facing (that way, your top-down token can turn to face its enemies!)
- Circle: circular tokens are like pogs or poker chips - round images that represent the creature or character. Because they are markers and not meant to be realistic "top-down" views of a creature, when you select Change Facing, instead of rotating the image - which would look bad - a small yellow arrow appears to indicate facing.
- Square: square tokens work like circular tokens, except that they are...wait for it...square.
Size
A token can be given a number of sizes, which scale the token image larger or smaller.
The available size depend on the map grid used when setting up a map. If you set a map with a grid (hexagonal or square), you will have the Free Size option (which lets you scale the token as you need), or a number of sizes from "Fine" to "Colossal" (if you play D&D, you'll probably recognize them).
If you do not set a grid when you create the map, you will be able to scale the token along a number scale, from -11 to +20.
Properties
This field allows you to indicate which of the available property sets in the campaign this token has. The designer of a campaign can set up different sets of properties to be used by different tokens (for instance, a set of properties for player character tokens, and a different set of properties for non-player character tokens). This field lets you pick which property set to use.
Has Sight
This field allows you to indicate what kind of sight the token possesses. Sight settings allow the gamemaster to simulate darkness, light, hidden objects, and hiding enemies.
Snap to Grid
This checkbox simply indicates that the token snaps to the existing grid when it is moved. If unchecked, the token does not pay any heed to the grid when it is dragged around on the map.
Visible to Players
This checkbox lets you designate a particular token as invisible to players - when checked, no player connected to the game will be able to see the token or interact with it in any way.
Layout, Portrait, and Handout
There are three fields dealing with the token's visual appearance:
- Layout: this shows how the token will look on the map
- Portrait: this is a separate image that will appear in the lower left corner of the map screen when you hover over the token
- Handout: this lets you designate an image to appear when you right-click on the token and select Show Handout
{{#customtitle:Introducción a tokens|Introducción a tokens}}