Introduction to Mapping
Introduction
The purpose of this guide is not to delve into the seamy underbelly of MapTool's macro scripting system, lighting, properties, or any of that complex stuff. Instead, this guide should get you started on the path of using MapTool as a mapping program for role-playing games. Future Quick 'n Dirty Guides will introduce hosting an online game and letting your gaming group join in.
The following instructions should get you up and running with MapTool to use as a battle mapping/general mapping tool. This assumes a few things:
- You know how to create or get some map images. There are terabytes of map images out there on the web. Check out the RPTools Gallery or RPGMapShare for tons of way cool images.
- You can run MapTool on your computer. MapTool requires Java 1.5 to be installed on your machine; it's up to you to go find and handle that business.
So here we go. To begin with, the no-brainers:
- Get MapTool from http://rptools.net. The latest "build" version of MapTool can always be found at the top of this list. Currently, the latest build is 1.3.b53, but that changes frequently. NOTE: You can also run the Java WebStart to run MapTool without downloading and unzipping the file.
- If you download the zip file of MapTool, unzip it somewhere on your computer and make sure it runs. The built in .bat files set some parameters when you run, like allocated memory and so forth. It will run if you double-click on the .jar file, but it will give you warnings. If you use Windows, you can use the Windows Launcher as well, which makes altering the settings very convenient.
Now, let's get some useful mapping going.
Getting Images into your MapTool Resource Library
1. Obtain some images (maps, for instance) from somewhere: these can be downloaded off the web, or created by you. Put them in a directory where you'll remember them - this directory is important for step 3.
2. Open MapTool.
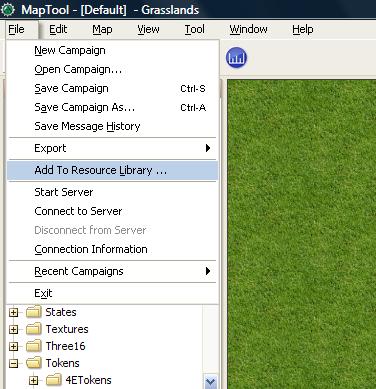
3. Select File -> Add to Resource Library. This will open a standard file dialog, from which you want to select the directory that the map images (or map tiles) are stored in.
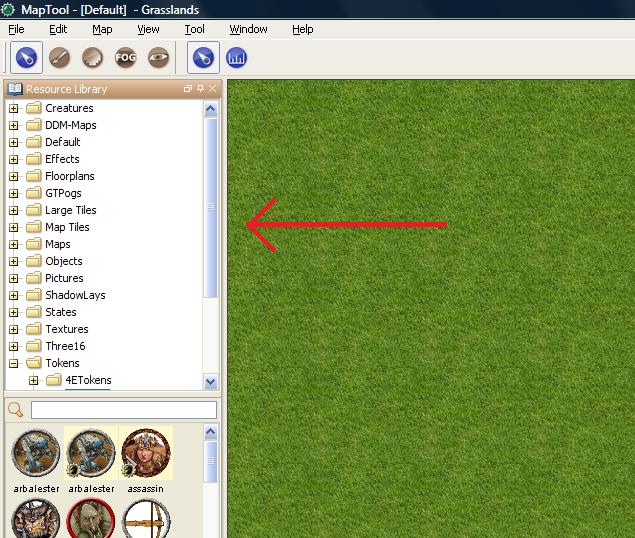
4. Select the folder where you stored the map images you want to add, and click Open. MapTool will run through the images and add a new folder in the Resource Library tree. Afterwards, if you select one of the folders in your resource library (as seen in the image below), you'll see thumbnails of the images inside that folder. NOTE: if that folder has subfolders, hit the + to expand that folder tree.
Creating a Map
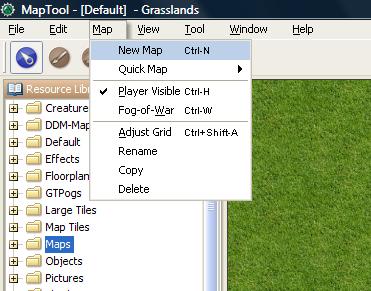
1. Go to Map -> New Map. This will bring up the New Map dialog.
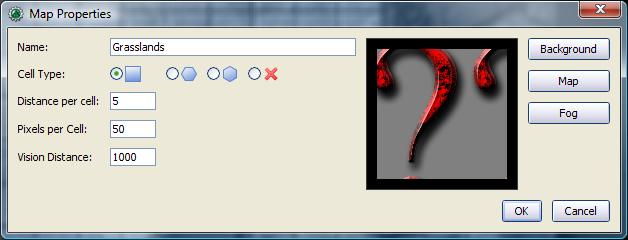
2. On the left hand side of the New Map dialog, you’ll see several options and text fields.
- Name: this is the map’s title. Note that if you select a map image, the title resets itself to the filename of the image. Best bet is to title the map last, so you can call it something you like, instead of xqmap2.jpg or whatever it was originally called.
- Cell Type: hex or square map, or no grid at all.
- Distance Per Cell: this is how many arbitrary units each cell covers (e.g., for Dungeons & Dragons 4th Edition, since everything is counted in squares, you can just set this to 1)
- Pixels per cell: this is how many pixels each cell should cover – the default is 50. This is most important for scaling to map images you downloaded.
- Vision Distance: MapTool has vision, fog-of-war, and other functions, so this indicates how far, by default, a character can see on the map.
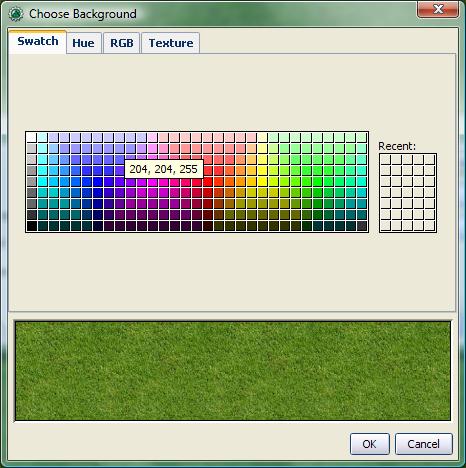
3. Click the Background button. You’ll get a pop-up dialog offering several options.
- Swatch: lets you use a uniform color as the map background
- Hue/RGB: lets you specify colors instead of selecting a color swatch
- Texture (what I use most often): gives you access to your resource library, where you can select a texture to serve as the background.
Note: the background image/swatch/texture is infinitely repeated in all directions. Because I usually create maps separately, I generally just pick a black background.
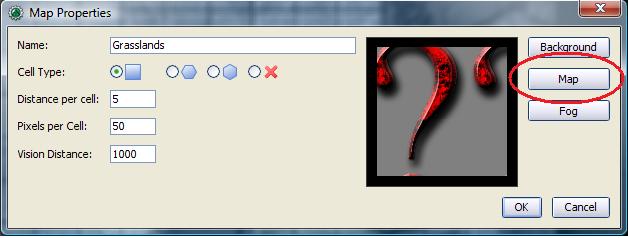
4. If you have a map image in mind (like a downloaded one, or one you created in Photoshop or something like that), click the Map button.
You’ll be taken to a dialog that shows your Resource Library. Here, select the image you want to use. This image will be layered above the background you already selected.
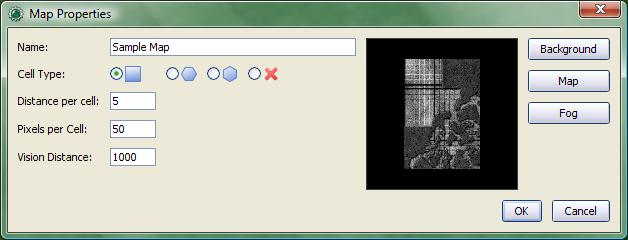
5. When you’re satisfied with the background and map – you’ll be given a preview thumbnail to double check, as shown below - give it a title, and click OK. The map will now be loaded into the main window of MapTool.
MapTool Main Window
MapTool Layers
Once you have a map loaded, you’ll see a small box in the map window titled Layer. MapTool maps have four layers:
- Background: this is the layer for images, background maps, and anything that isn’t going to move.
- Hidden: for online games, this is a layer only the GM can see.
- Object: this is a layer for token-like objects, things that might move, or that players might be able to move (lamps, tables, etc.).
- Token: this layer is the layer that tokens go on (tokens are small images that represent characters or NPCs). Make sure you have the Token layer selected when you’re adding characters and enemies to the map.
Selecting Multiple Maps
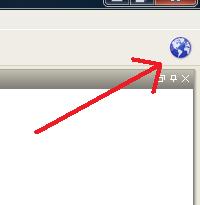
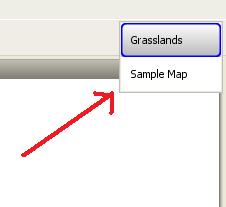
If you create multiple maps, you can choose between them by clicking the blue globe icon in the upper right hand side of the MapTool window – this will present a list of possible maps.
Zooming and Moving
To zoom the map, you can use the mouse scroll wheel (if you have one) of you can use the equals sign to zoom in, and the hyphen to zoom out.
Hitting the plus sign will zoom to 1:1.
To move the map, right click on it and move the mouse. This will pan the map in any direction.
Placing Tokens
Tokens are small images that act as visual representations of many things in a MapTool map. The most common use for tokens is to represent player and non-player characters - in other words, tokens take the place of miniatures on the virtual map.
Tokens, like everything else, start as image files that are stored in your Resource Library. MapTool comes with some default tokens (and they have a great, separate program called TokenTool that lets you make tokens), or you can supply your own from wherever you find them.
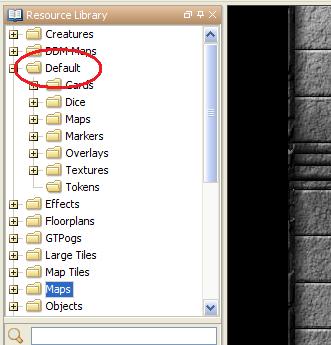
1. To see the default tokens, go to the Default folder in your Resource Library, and click the + to expand it.
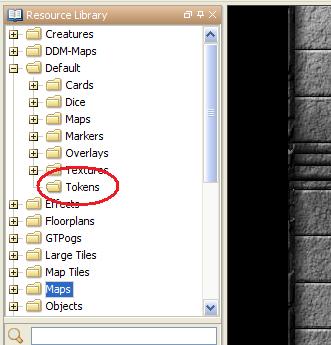
2. Select the Tokens folder.
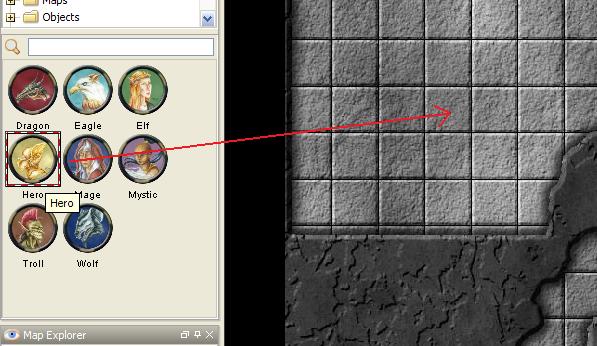
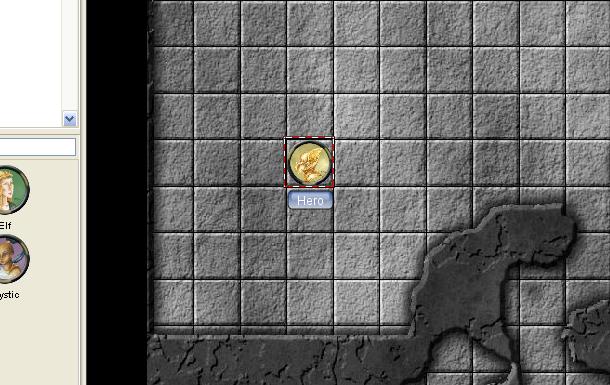
3. In the window below (where the thumbnails appear), use the mouse to drag a token onto the map. The cursor will change to a hand, and you just need to hold the token over the map somewhere and release the button.
When you release the mouse button, the token will appear on the map, like so:
Moving and Altering Tokens
Once a token is on the map, it can be dragged around using the mouse, or moved by selecting the token (clicking on it) and using the arrow keys to move the token, and pressing the D key to complete the move.
If you want to create a complex path, you can hit the space bar to make a waypoint in your path.
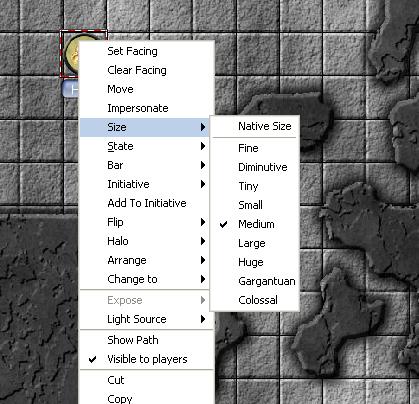
Tokens will default to the size of one grid square (note that by default, MapTool’s grid is 50x50 pixels). If you right-click on a token, the menu has a lot of options – one of which is Size. You can then set it using the size values there, so you can make large or huge or gargantuan creatures, and so forth. The image below illustrates the right-click menu for a token.
NOTE: these size values (large, huge, gargantuan, etc.) only apply to maps that have a grid (remember, when you create a map, you have the option to make a map with no grid). If you use a gridless map, the size values are more fine-grained.
Saving Your Work
MapTool's default "save" format is called a Campaign File. The Campaign File (which has the extension .cmpgn) contains the maps and tokens that you've set up. If you're interested in this sort of thing, the campaign file is actually a zipped XML file.
To save your work so far, choose File -> Save Campaign, give your campaign a name, and that’s all there is to it.
When you save a campaign, MapTool saves the locations of the tokens on all of the maps, so you can pick up right where you left off!
Exporting Map Images
MapTool can export your map images to an image file (PNG format). To export an image to a location of your choice:
1. Go to File->Export and select Screenshot As.
2. In the dialog that comes up, select a "View" (either GM view, where you can see everything, or Player View, where the only things visible are what players can see...I told you MapTool had some cool vision capabilities!)
3. Select the destination for your file using the Browse button (or, alternatively, send it to an FTP server)
4. Click Export.
Next Steps
Now that you can create a basic map and put some tokens on it, the next step is connecting up with some friends over the Internet (or face to face) and using it for a game session! This is a topic all by itself, so it'll be left to another Quick 'n Dirty Guide.
